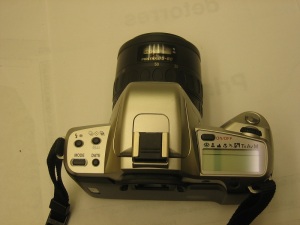
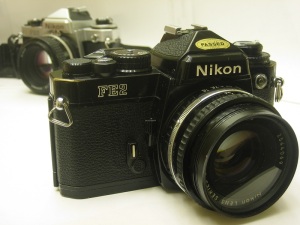
 I used my coworker’s camera for my first and third rolls of film, but even though my coworker wasn’t in a rush to get her camera back, I knew I had to get my own. Someone gave me advice and recommended that I get something like a used Nikkormat/Nikon EL, EL2, FE, or FE2 because of their build quality and their use of a match needle. Ridiculously enough, I bought two – one from craigslist and the other from ebay. I originally planned to sell one of them, but I haven’t really gotten around to it. So for now, I’ve got double the fun.
 There is a minor problem with a camera as old as the FE2. The seals turn to mush. Thankfully, you can buy seal kits on ebay that make it relatively easy to change them yourself.
 I first noticed the mirror foam falling apart on the black one, so that’s the one I started with.
 This light seal on the film door was a sticky mess.
 After removing the door from the body, I applied an adhesive removal solvent on the old seal.
 I then used one of the bamboo tools provided in the kit to scrape off the old seal.
 The new seal applied on the door on the left and an old seal on the door on the right. The other door was from the silver FE2.
 Another view of the replaced seal along with another seal that was replaced underneath the tab that resets the film counter.
 The new seals fitted onto the left side of the film door.
 The bamboo tool was used again to scrape out the sticky mess that used to be the old foam seals that run in the grooves on the top and bottom of the film door opening.
 Once cleaned out, the new foam seals provided in the kit were guided into place.
 I used the bamboo tool to carefully set the new foam seal into place. The seals were a little longer than the grooves they were being put into and needed to be cut to length. There is no need to pull on the foam and stretch it’s length since there is more than enough of it provided in the kit.
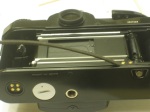 I did the same for the groove on the bottom.
 A view of the new seals in their place and cut to length. In this photo you can also see the titanium honeycomb shutter which allowed the FE2 to acheive a 1/4000 sec shutter speed. That was remarkable in it’s time.
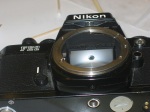 Be careful when removing the old foam stuck to the mirror. I’ve read that the mirror scratches very easily. To remove the foam from the area the mirror slaps against, I turned the camera with the lens opening face down, and scraped it out with the provided blade. Keeping the lens opening face down made working uncomfortable, but it kept the bits of foam from falling into the camera body.
 The instructions recommended licking the adhesive on the new foam to help make it easier to position it. Once that was done, the camera was good to go.
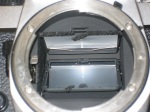 Then it was the silver one’s turn. What’s wrong with this picture?
 So far, I’ve just changed the mirror foam. It’s been working fine since the other seals weren’t as bad as they were in the black FE2. I do plan on going in and changing everything else in the near future though. The process is simple but time consuming, but fortunately both Nikons have been working flawlessly since.
 How do I like the FE2? I think it suits my needs as a student perfectly. It’s solidly built with a metal body that provides enough weight to help keep it steady. It’s simple to use with only a dial for shutter speeds and an aperture ring on the lens. It also has an aperture priority setting, which I admit to using quite often. And yes, that match needle has come in handy with it’s visual representation of recommended exposure values.

